Love you lots <3
Makeup * Nails * Fashion
Sunday, November 30, 2014
Updates and Coming soon!
I'm so sorry I haven't posted in forever, over a month, but I have not been able to come up with post ideas and even if I had an idea I would not have had time to even sit at my computer and write a post. Everything has been really crazy and I have just been so busy that blogging has been out of my reach. But I am not going to let that stop me from doing what I love so I am going to try hard to keep this blog up and running! So what better time is there for me to fix my blog than December! I love December because it means Christmas, which of course is my favorite time of the year! I have so many plans and posts already cooking for you guys that I am really excited to share. A few posts that are coming are: November favorites, Black Friday mini haul, decorating my room for Christmas, decorating my tree, and many other Christmas themed things! So I haven't been very active right but that that is going to change right now! Another thing that I have planned is to do tweetmas, which is where I will tweet everyday, answer questions and do different tags to make you all get to know me more and get more into my blog. I really want to start a YouTube channel and participate in vlogmas but I feel that it wouldn't be very interesting for you guys because my vlog would mostly be me going to and from school and hockey practice. So a YouTube channel may be coming later but I will not be participating in vlogmas this year. But anyway so this is a bit of a laid back, update post. I like to do little posts like this to fill you guys in on what is going on in my life so let me know if you like these types of things. As always, I am open for any suggestions and I want to read your comments and opinions so please tell me what you guys think! So I will see you all very very soon!
Friday, October 31, 2014
Halloween Nails
Halloween is just arround the corner! And no costume is complete without perfect spooky nails to match! So this week i gatjered some inspiration and nail polish and got to work to show you these 5 designs for your spooktacular nails this Halloween. I will show you how make mummy, pumpkin, Frankenstein, skull and candycorn nails. First up is the mummy.


1. Paint a black base color
2. Add fairly large white circles for eyes using a dotting tool or a striping brush
3. Add smaller circles inside using the same black circles as before
4. Use a striper or thin brish to createany small lines for the wrapping
5. Admire your nails!
Pumpkin:
1. Paint a base color, i used a sparkly white but of course you can just leave your natural nail
2. Paint a small circle at the tip of your nail in orange to create the pumpking base
3. Paint lines on the pumpkin using a darker oranges to create stipes
4. Add a leaf and a stem
5. Admire your nails!
Frankenstein's monster:
1. To a green base, add some spikey hair
2. Add large white cirlcles for the outside of the eyes
3. Add smaller black circles for the pupils
4. Use a thin brush to Create a line and stitching for the mouth
5. (Optional) add sliver bolts
Skeleton:
1. Paint a white base
2. Add large ovals for eye sockets
3. Paint a triangle for the nose
4. Paint a curved mouth with a fine brush similar to the Frankenstein mouth
5. (Optional) add a matte top coat
Candy corn:
1. Add a small yellow both at the vase of your nail
2. Add an orange blotch over top
3. Finally add a white blotch and blend
4. (Optional) add a sparkly top coat
And thats it! :) Those are all my apooky halloween nails! Let me k ow what you think and send me pictures on twitter! As always send me suggestions and follow me on all of my social media! Happy Halloween!
Love you lots <3
Monday, October 20, 2014
Getting lost in IKEA and the cutest mug ever
Yesterday night was homecoming at my school and since there isn't very much dancing going on, my friends and I decided to dress up and just hang out instead. So we went all over town! First we went to the mall and tried on all kinds of dresses and ran around, I found this gorgeous gown and was dancing around in it. Then we took a trip to IKEA because one of my friends had never been there before. It's like a whole different world over there. I just love looking at all the well-put together rooms and sitting on all the beds and couches. I took a picture looking over the top of all of the rooms which for some reason I really liked it.

It's a behind the scenes picture if you will and I just thought it was very cool :) While I was running around IKEA I also found the cutest little espresso mug that I just had to share with you guys

After IKEA we went to dinner and then hung out and watched movies. It was just a fun weekend just hanging out with friends.
I hope you like this type of post, it was more of a day in the life post instead of beauty. And I know technically this is a beauty blog but I just wanted to change it up a little bit and see how you like it! I will see you next week with a tutorial on how to do some spooky Halloween nails!
Love you lots <3
It's a behind the scenes picture if you will and I just thought it was very cool :) While I was running around IKEA I also found the cutest little espresso mug that I just had to share with you guys
After IKEA we went to dinner and then hung out and watched movies. It was just a fun weekend just hanging out with friends.
I hope you like this type of post, it was more of a day in the life post instead of beauty. And I know technically this is a beauty blog but I just wanted to change it up a little bit and see how you like it! I will see you next week with a tutorial on how to do some spooky Halloween nails!
Love you lots <3
Sunday, October 12, 2014
Autumn Love and Posting schedule
I know I haven't posted in a month but don't worry, I am not giving up blogging. School had just started and I had to get adjusted to a new homework load and more responsibilities. But now that I'm back in the school swing, I am ready to set a posting schedule! My plan is start out with 1 post a week on Saturday mornings and slowly move up to 2 posts a week. Hopefully I can keep up with this schedule starting next weekend!
Now that I got through all the business, I wanted to talk about my favorite season starting: fall! I love fall; the crisp breeze, the smell of leaves, all the beautiful colors, just everything that makes fall special. Recently I have been listening to one song on repeat that just puts me in a great fall mood, Bloom by The Paper Kites. It's such an upbeat song, it makes me feel happy and it reminds of all the reasons I love fall. I listen to it as I walk home from the bus stop and one day as I walked under a giant tree, the wind blew the leaves off the tree and I watched as they swirled through the wind. It made me smile and it made my ordinary day just that much better ♡
I'm hoping to make many more fall posts so make sure to follow me on bloglovin', as well as all of my other social media, so you can know the next time I make a post. So my message to you today is: pay attention to the little things and your day may just improve in ways you never thought were possible
Love you lots <3
Sunday, September 14, 2014
Birthday Gifts
I had my birthday party this weekend since my birthday was this week and I thought that you would want to see what I got.


 Funky Fingers color change:


Here is an over-all view of what I got, a mixture of make-up and nail polish bits. So let's dive right in.
Make-up:
So from right to left I have:
- Nivea Creme- hand and body butter/lotion
- Covergirl Cheekers blush- shade classic pink 110
- Covergirl Professional Super Thick Lashes mascara- shade very black
- Baby Lips Dr.Rescue medicated lip balm- shade too cool 35
- Baby Lips Electro- shade minty sheer 90
- Covergirl eyeshadow- shade shimmering sands
- EOS hand lotion- scent berry blast
Nail polish:
Xtreme wear:
- White on- 300
- Blue Boom- 423
- Golden-I- 485
NYC:
- Lexington Lilac- 147
- Skyline Blue- 151
- Hang ten brah
- Surf's Up
Essie:
- Ballet Slippers- 162
Sinful Colors:
- Out of Bounds- 1211
Nicole by OPI:
- Matte top coat
Sally Hansen:
- Base coat
That's everything that I got for my birthday! Hope you like it! Let me know if you have any of the same products and if you like them. You can send me ideas and suggestions for blogposts and my blog on all my social media :)
Love you lots <3
Monday, August 25, 2014
Water marbling fail?
I always try to water marble my nails and it never turns out the way I had hoped or seen others do in pictures. This is quite discouraging and I try to find tips online but all they say is PRACTICE! So I have been practicing and my most recent attempt is pretty good so I would just like to share with you what I did and what I think helps.

First tip is to use room temperature water. This is very important because if your water is too warm or cold the polish won't spread the way that it is supposed and therefore won't work.
Second tip is to use a newer bottle of nail polish. Older nail polish tends to separate or become sticky/gloppy. Also the brand of your polish is important. This attempt I used OPI and Essie brand polish and they both marbled easily and stuck to my nails without being watery. Some over polish brands are too watery and don't work as well.
My last tip is to tape around the outside of your nail so that you can speed up the cleanup process. As you can see from the picture below, I used a purple/reddish shade and a gold/reddish shade so when the excess was left around my nail it looked as if I had just murdered someone. After you remove the tape you can dip a q-tip or cotton swab in nail polish remover and clean up whatever is leftover.
So here is my attempt:
This attempt isn't too bad compared to some of my other tries but it still isn't the best. I should have used 2 colors that weren't so close together but because of the whole issue of which brand works, this is what I had to deal with. So hopefully you will learn from my mistakes and end up with beautiful water marbling. If you try the water marbling technique, you can send me pictures on my social media :)
Love you lots <3
Saturday, August 23, 2014
August makeup favorites
August isn't over yet but I thought I would just give you a peek into what I have been loving this month makeup wise. I have made many trips to Ulta, Sephora, and Target in the past month to find these perfect products that I cannot stop raving about. So here are my August makeup favorites.


First off I would like to talk about this gorgeous Covergirl lipgloss that I found at Target and fell in love with. This is Covergirl's Colorlicious lipgloss in the shade 700 or "Whipped Berry". This color is such a perfect pink that when you put it on it isn't a neon Barbie pink, it is just the perfect shade. I am a huge lipgloss girl and I can sometimes have problems finding lipgloss that isn't too sticky or too wet and that doesn't break the bank. This lipgloss doesn't do any of those things. It makes my lips feel smooth and moisturized while still being very glossy and it only cost $5.99! I cannot rave about this lipgloss enough so just try it for yourself and tell me what you think.
Next favorite is the Rimmel Wake Me up concealer in the shade Light/fair. This concealer is very brightening and conceals under the eye circles very well without looking too cakey or heavy. It is very light and I got it for a very low cost, I think about $5 which is great.
Now I have Maybelline's The Rocket mascara in the waterproof formula. I love this mascara because it is waterproof, it make my eyelashes flare and look fuller and it isn't too expensive. (sense a theme here). I am all about saving money especially when it comes to makeup products because I don't want to spend a lot of money on something that may not even look good on me. This only cost $5.99 which is a great price for this quality product.
Now I am not too sure what looks best when it comes to bold color eyeliner. But since I didn't have any I thought that I would never know unless I tried it so I popped into Ulta and picked up these and fell in love. The eyeliner on the left is the Pixel Pro Eye Liner pencil in the shade 401-02 or"Fabulous" and the eyeliner on the right is NYX Eye/Eyebrow pencil in the shade 910 or "Satin Blue". Both of these liners glide on smoothly and leave a lot of color behind without being too dark or heavy.
Last but not least I have this Maybelline New York Dream Pure BB 8-in-1 skin clearing perfector, and I'm not exactly sure which shade but it is one of the lightest ones. This BB cream has very light coverage and goes on very smoothly so if you are the kind of person who likes to cover everything on your face then this is not for you. This BB cream goes on like moisturizer and stays on all day. It does have a bit of a dewy finish but I just like to powder over top since I have slightly more oily skin and I don't want to look greasy. The product description off the Maybelline New york website says,
- Clears acne
- Conceals imperfections
- Minimizes look of pores
- Reduces appearance of redness
- Adjusts to skin tone
- Hydrates and smoothes
- Enhances and clarifies skin
- Is oil-free, with a lightweight feel
I think it does all that while still being in my price range at $7.49.
Those are all of my monthly favorites and if you are also loving some of these products, let me know in the comments or on my social media :)
Love you lots <3
Wednesday, August 13, 2014
Back to school preperation
Since summer is almost over, I thought that I would come up with a few ways to get yourself ready for a new school year.
- One way is to get a haircut. It's not like you have to chop off all of your hair, but maybe just a clean new trim for yearbook pictures or a new style to change up your look.
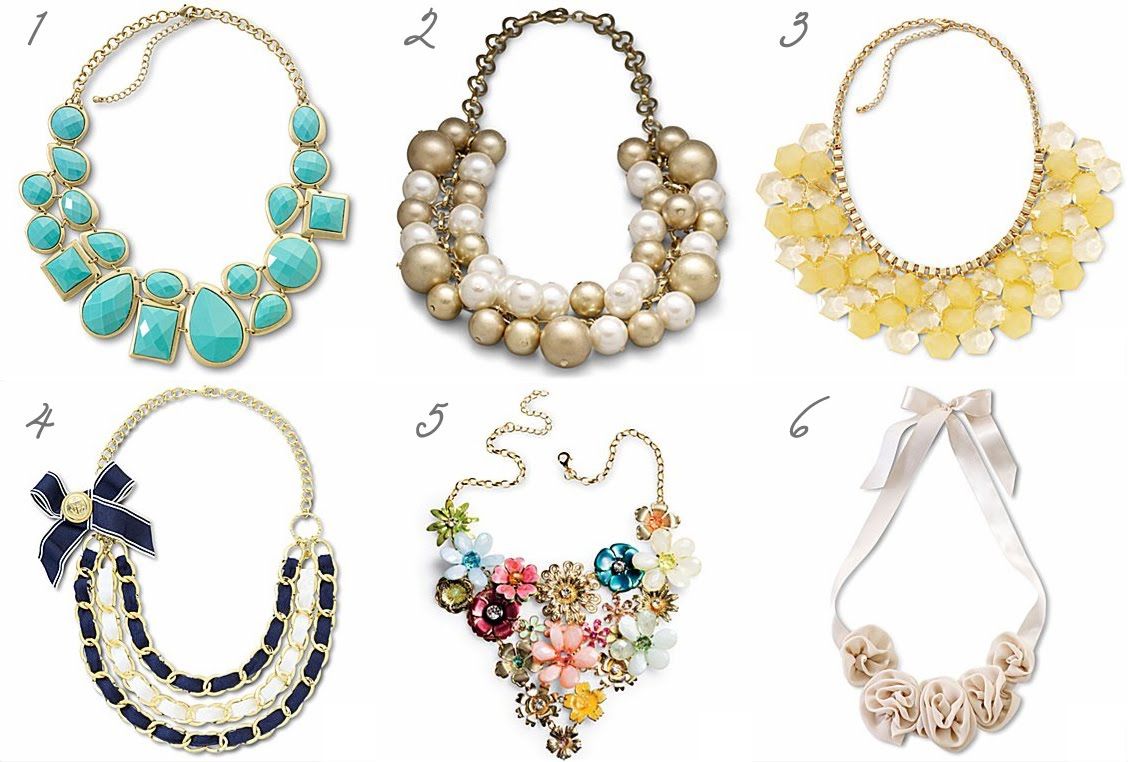
- Another way to change your look is to buy some new clothes. If you are like me you will want your entire wardrobe to be different but we all know that that can end up being very pricey so you can always buy some new statements pieces to change your wardrobe from the previous year such as a statement necklace/jewelry or some colored flats. I love having colored or patterned flats because it can turn an ordinary/casual outfit into something special.

- One of my last tips is to get a cute backpack. Although this can sound a bit dreary, it really helps me to get a cute backpack that I love to help me get in the back to school mood. Canvas backpacks can be very cute and helpful in school because they are very durable and can hold a lot of school supplies.
- My last tip is to be comfortable in whatever you wear and not stress too much. Just be yourself and everything else will fall into place :)
Love you lots <3
Thursday, July 31, 2014
Butterfly nail art
A couple of weeks ago I was searching on Pinterest for the most popular nail art and a saw a lot of pictures of monarch butterfly nail art and I thought that I would give it a try but put my own spin on it. So i made a gradient base on each nail, added a sparkly top coat and finally added the butterfly wing design on top and the result was gorgeous! I was so in love with this nail design and hope that you are too!

Love you lots <3
If you try this design send me a picture on twitter: @gracenbeauty23
Love you lots <3
Subscribe to:
Posts (Atom)